Tuesday, September 10, 2013

Part 5 - Tire and Wheel Upgrades

So it's been some time since our last update, so here's the latest....

For choice of tires it was an automatic decision on what to use.
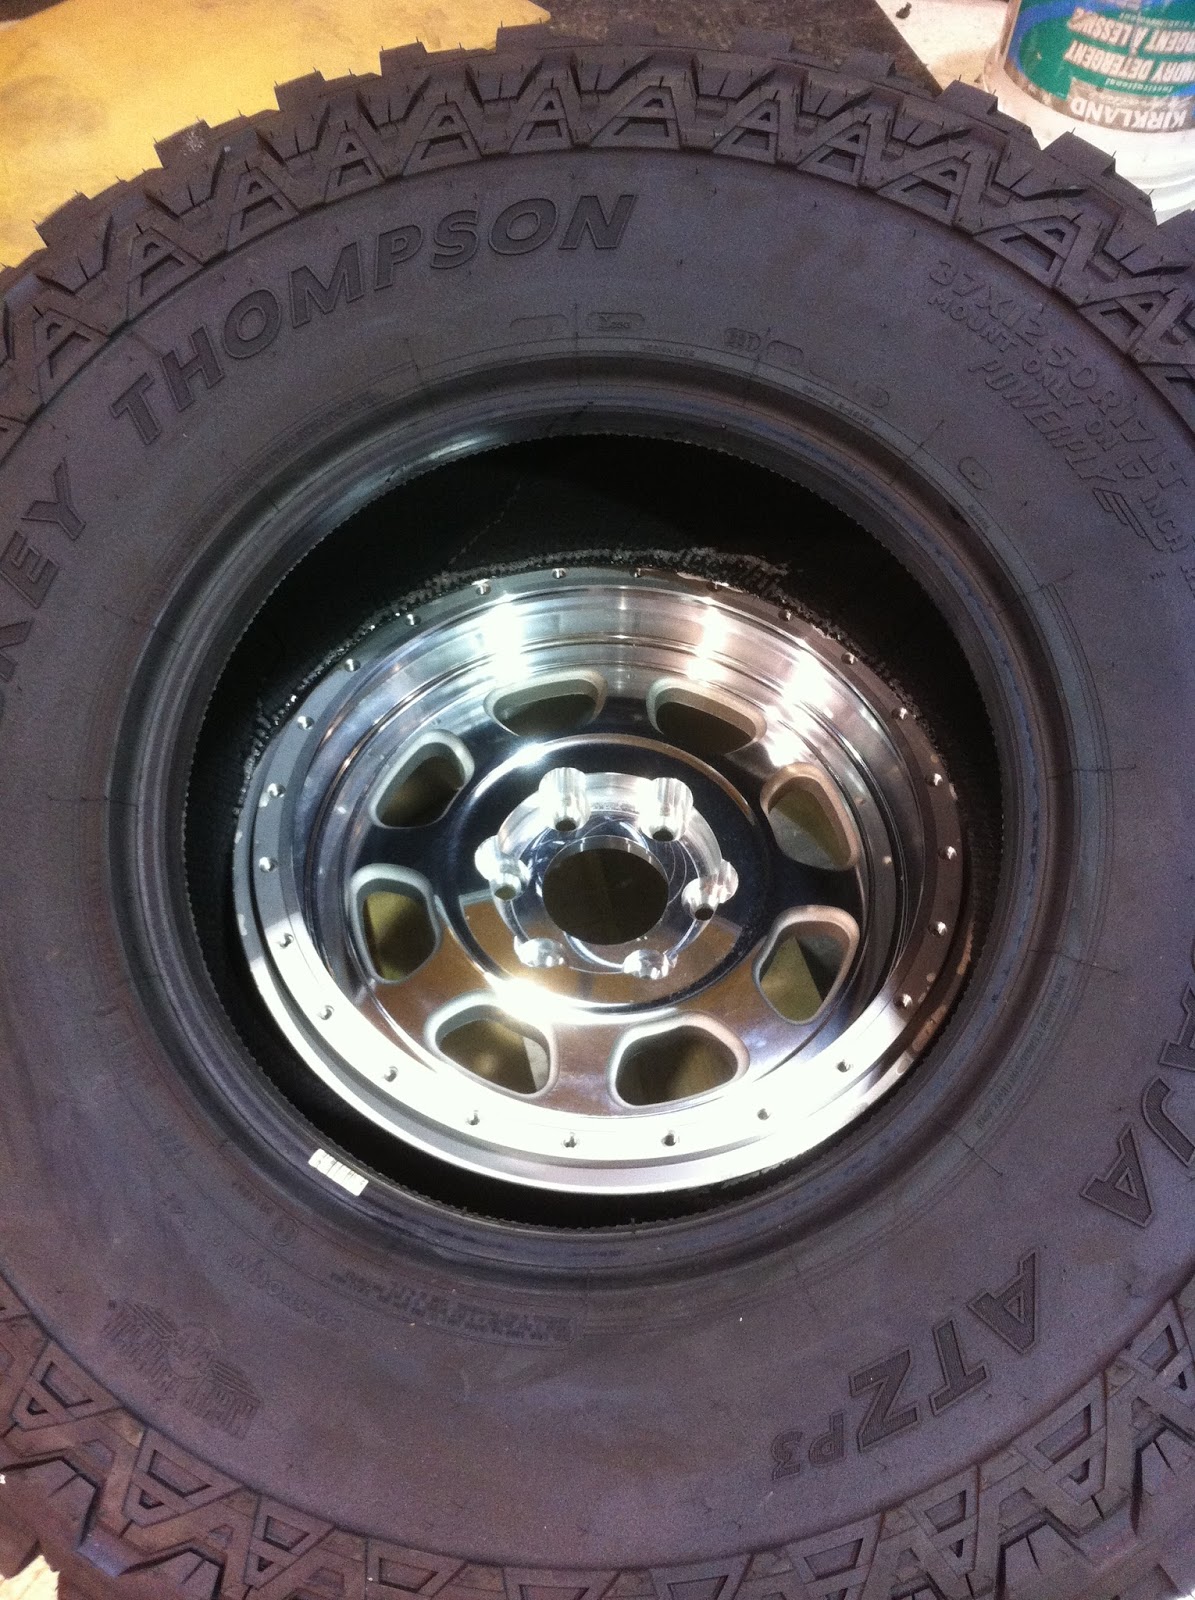
MICKEY THOMPSON just released their new ATZP3 - 37x12.50x17

  • New compound with improved cut and chip protection
  • Deep, aggressive sidebiters for improved protection
  • Multi-draft grooves for self-cleaning and improved wear
  • PowerPly™ 3-ply sidewall construction


  • Beside being a brand new tire, Mickey Thompson recommended us to use this tire due to many Off-Road Race Teams having really good success on the track and trails.

    Contact your nearest Cap-it Store for more details about Mickey Thompson Tire & Wheels Products.

     
    As for wheels we called TRAILREADY Wheels (they are also one of our suppliers for H/D Front Bumpers) and ordered up a set of their 17x8.5 HD Beadlock Series Wheels with a Cap-it Red powder coat ring.
     
    TRAILREADY
     
    The beauty of beadlock wheels is that you really don't need a tire machine to mount the tires on. All you have to do is get some soapy solution and lube up the tire bead and push the tire onto the wheel.


    For those of you who don't know how a Beadlock wheel works, here's a short briefing on it. The majority of wheels have 2 inner lips on the wheel to where the tire locks onto. On a Beadlock wheel the wheel lip is reversed in where the tire sites on the top of it and then Beadlock Ring clamps the outside of the tire to the wheel.
     
    Off-Road enthusiast prefer this method at it limits the possibility of having the tire blowing a bead in having the tire come off the wheel.
     
     
    Now time to install the Beadlock ring with the supplied hardware
     
    To tighten up the 24 bolts to the ring, just like a tire you alternate in a criss-cross pattern which give you even pressure around the seal.
     
     
    Once your finished torqueing all the bolts down to 20lbs the actual beadlock ring will have a concave look to it. This is due to sandwiching the tire in between the ring and wheel.
     
    Now we air them up to 36lbs and check for leaks. Luckily we had none to deal with.
     
    Now for what they look like on the truck
     
    A preview on how the truck is going to look.


    Next we mount up the Fiberwerx Bedside Panels


    Thursday, June 27, 2013

    Part 4 - Suspension Install

    We've been so anxious in getting the F150 completed, we haven't had time to keep you up-to-date on our progress.

    To continue where we left off, before we paint the knuckle, the rear steering stop has to be cut off to allow for more turning radius. The reason for this is that the lower control arm is so beefy is actually cuts down on the turning room. so off it comes.

    As you can see we've sprayed some rock guard on the knuckle and installed the new upper Heim Joint. Then we test fit everything to make sure we've got the proper clearances.

     Finally our King Racing Shocks have arrived!!
    We hooked up with King Racing out of California about a month ago, Gave them some specs in what what we were needing and they took it from there. 

    For the fronts we're using the 2.5" x10" Performance Race Series, 800lb rated coils with remote reservoirs. As for controlling the compression travel we're adding 2.5"x4" Bump Stops stroked to 3" with a 1" internal spacer. 
    This will provide a very smooth compression stop.


    For the rears we went for the OE Performance Series piggyback shocks. Since we're keeping the rear suspension stock, we've kept the shock travel the same length.  We'll also add some rear bumps stops to it as well to cushion the compression travel.
      
    In the instructions it calls for the upper coil retaining collar to be 2-1/2" down from the top of the thread. After we set this we tried installing it and there was no way we were able to compress the coil to attach the lower a-arm. So we backed it off enough that we can get it all hooked up. We'll play around with that retainer collar later as it sets the ride height profile once the truck is sitting on it's own weight.

    Time to install the coil over. Start by routing the reservoir through the top shock tower.


    In order to attach the lower a-arm to the shock mount, we had to use a couple of tie-down straps to help compress the coils in order to bolt them together. Being 800lb rated it's not something you can do by hand.

      
     To prevent and damage from over extending the suspension travel, we installed a limiting strap to control that. 

    Next thing on the list, the steering linkage needs to be addressed. Supplied in the kit is a tie-rod extension link. it basically attaches between the tie-rod and steering linkage.


     Time to mount up the KING 2.5" Bump Stops. First we had to determine where we wanted the compressed suspension to stop before we rip off the fenders when landing a jump. Once we marked this out, it's time to get a little creative with the mounts.
     
    First we tack weld the bump stop sleeve to our location
     
     
    Next we add some added 3/16" support plates to both side of the sleeve and welded them up to the frame.
     
    the only thing left to do is put in the 2.5" KING bump stop and paint it all up.

    Monday, June 3, 2013

    Part 3 - Tuff Country Long Travel Suspension


    Going back to 2009 I remember seeing an article in
    4Wheel & Offroad magazine on Tuff Country's new Long Travel Suspension. This kit provides a wider track stands and gives you over 13 inches of wheel travel. At that time I was pumped about that kit in how wicked that would look on our 04 F150. Here we are 4 years later and we're now going for it. So we called our good friends up at  
    TUFF COUNTRY Suspensions and before we could even finish our conversation they were on board and wanted to be apart of the Cap-it Prerunner F150 project. Days later the L/T kit is at our Cap-it Warehouse. 
     

    First off all the fiberglass fenders that we mocked up earlier had to be removed to give us more working room on the front of the truck. We also removed the front suspension earlier so we can mount this kit right up. 

    As you can see there's a huge difference between the stock upper and lower control arms. The overall track width from the new setup will give us about 4 inches per side. That's a total of 8 inches in just changing out the suspension.

    First things first, we have to cut a 5" hole in the stock strut tower bucket. The reason for this is so that our coil-over shock can be mounted through it. 

    The kit provides a steel template that needs to be centered on the top of the strut bucket. 


    Clamp it in place and drill 6 - 3/8" holes. These holes are for the coilover shock bracket that'll be installed shortly. 
     
     To cut the hole in the strut bucket it says to use a 5" holesaw and after 2 attempts at that there was no way that was going to happen unless you want a couple of broken fingers. So it's time to break out the plasma cutter. I used my $30 holesaw as a template instead, clamped it in place and started cutting. 


    Here's what it looks like after the cut and how much was was removed.


    Afterwords we took the die grinder to smooth out the hole.  


    Since I was having so much fun with the plasma I wanted to cut more stuff up. So off comes the front bumper brackets.


     Yah gotta like having the right tools for the right job.
    Nice clean cuts. The sparks are cool also.


    Next comes installing the lower control arms with a new ball joint pressed (now's the time to do this since we have it all apart) and the upper a-arms to make sure everything fits.
     
    Now for stock steering knuckle. We have to drill the upper tapper hole out to 1". This will allow us to install the massive heavy-duty heim joint that's needed.


    I'll throw up a new post here within a few days as we're going to paint and mount everything up. 


    Wednesday, May 8, 2013

    Build 2 - The First arrival of Goodies !!

    Well the day has finally come in where we get some eye candy for the F150.

    We hooked up with FIBERWERX and got a complete set of front fenders and beside panels to give us that Prerunner Baja style we're after. It'll also gives us the clearance coverage we need to keep the tires and suspension within and not hangout. 
    We still want to keep this thing street legal of course.....
    As seen here FIBERWERX did a great job in palletizing the product. It survived the trip from California with no issues. 
    Here we are loading it up to take to the shop.
    OHHH YAHHHHH!!!!
     

    Now at the shop inspecting it and checking out the fenders


    So in preparation of the new fenders, we've already dismantled the front on of the F150. The suspension, fenders and bumpers have been taken off. 


    Everything I need is now off the front. Time to start dry fitting everything.


    Before - With Factory Fender

    After - with new FIBERWERX fenders on.


    As you can see there's a huge difference in fender coverage. The fender descriptions say 4.5" bulge and judging by this, we can definitely see it.

     The 2 fenders side by side

    As for the rear bedside panels, we haven't got panels off yet but very curious on what its going to look like. The pictures below show the FIBERWERX bedside panels just laying over top of the stock fenders. I will update on how we remove it later, but for the meantime the following pictures gives you an idea what it's going to look like.


    So here we are with everything dry fitted. This thing is a beast now. It's wide and definitely gives the truck the attitude we're looking for.


    More updates to follow as we mount up the front fenders permanently and dismantle the rear box to get rid of the stock bedside panels. 

    Also stay tuned for FIBERWERX products to be available soon at Cap-it Genuine Truckware 

    Like us on Facebook to stay in touch with the progress.